
How to Choose the Best Lighting for Any Space?
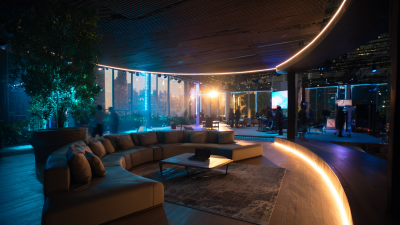
Choosing the best lighting for any space requires more than selecting attractive fixtures. Light Lighting should begin with the room’s purpose, dimensions, surfaces, and daily users. A reading corner needs focused illumination, while a kitchen requires bright, even light across counters. A bedroom often benefits from softer, warmer tones.
Dr. Mariana Figueiro, a respected lighting researcher, has said, “Light is the most powerful cue for the circadian system.” Her observation reminds us that lighting affects more than visibility. It can influence alertness, comfort, and sleep patterns. Therefore, consider color temperature carefully. Warm light around 2700K may suit a lounge, while neutral light near 3500K can support detailed tasks. Check the color rendering index too. High CRI lighting makes wood, food, and fabrics appear more natural.
Real spaces are less predictable than design charts suggest. A dark wall may absorb light, while a glossy surface can create sharp glare. Test the fixture at different times. Stand where people actually sit or work. Notice shadows on faces, reflections on screens, and brightness near windows. Small adjustments matter.
A neat formula can still fail. Personal preference matters. Energy use matters too. Choose efficient LED sources, dimmers, and layered lighting when possible. Combine ambient, task, and accent light instead of relying on one ceiling fixture. The strongest plan is practical, measurable, and willing to change after real users experience the space.
Assess Space Function: Design for 300–500 Lux in Offices (IES)
How to Choose the Best Lighting for Any Space?
An office should support concentration without making every surface look harsh. For many desk-based tasks, aim for 300–500 lux on the work plane, following IES guidance and the space’s actual function. Lux describes light reaching a surface, so measure it at desk height rather than near the ceiling. A reading of 400 lux beside a window may fall sharply deeper inside the room.
Start with the work being performed. Screen-heavy tasks need balanced ambient light, controlled reflections, and enough vertical illumination for faces and documents. Place fixtures to the side of monitors when possible. This reduces bright reflections across the screen. Use adjustable shades near windows, because daylight can change within minutes. Too much contrast is tiring.
I once assessed an office that met the target near the central desks but felt dim along the walls. The average looked acceptable, yet employees still added small lamps. That finding changed the plan. Measure several positions, including corners and shared tables. Check glare from seated eye level. A light meter improves reliability, but human feedback still matters. Some occupants need more light because of age, detailed paperwork, or visual sensitivity. The 300–500 lux range is a useful starting point, not a rigid answer. Recheck the space after furniture moves. Lighting plans can become wrong surprisingly quickly.
Build Three Layers: Ambient, Task, and Accent Lighting (IES)
Choosing lighting for any space becomes easier when you build three layers: ambient, task, and accent. The Illuminating Engineering Society (IES) supports this layered approach because one fixture rarely serves every visual need. Ambient lighting provides general visibility. Use ceiling fixtures, recessed lights, or evenly distributed wall lights. In a living room, aim for comfortable illumination without creating harsh shadows. Light should guide movement safely. Too much brightness can feel cold and tiring. That mistake is common.
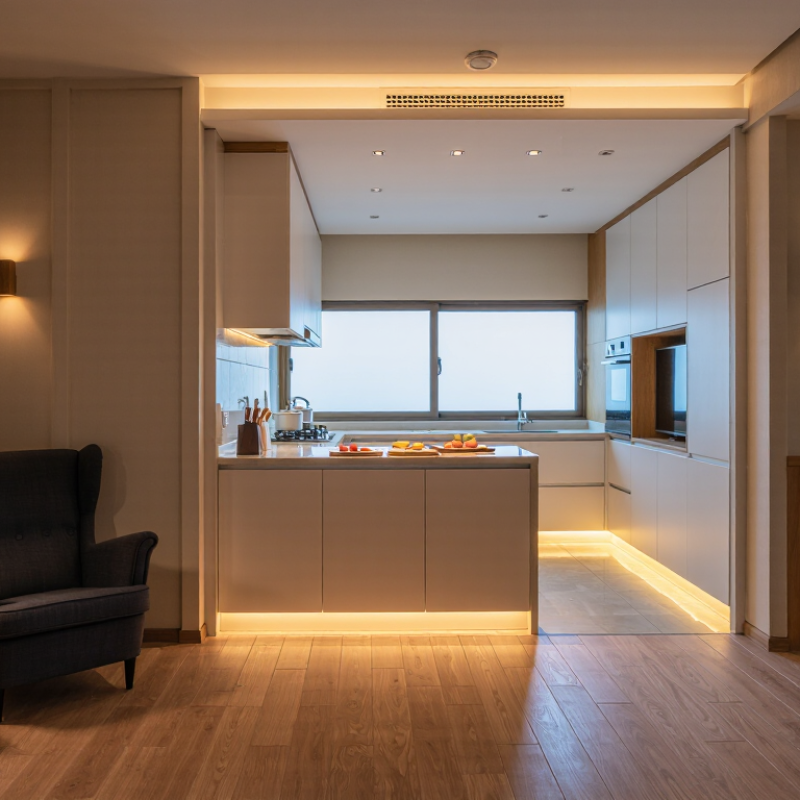
Task lighting supports activities that require attention. Place a desk lamp near reading materials, under-cabinet lighting above kitchen counters, or focused fixtures beside a mirror. Keep the beam directed toward the work, not into your eyes. Check the space at night, when reflections and shadows become obvious. A lamp that looks effective during the day may fail after sunset. I have learned this through repeated adjustments.
Accent lighting adds depth and visual interest. Use narrow beams to highlight artwork, textured walls, plants, or architectural details. Keep the light source hidden when possible. Otherwise, the fixture may become more noticeable than the object. Combine warm and neutral color temperatures carefully, since mismatched tones can make a room feel accidental. I still find that some “perfect” layouts look wrong in real homes. Furniture moves, surfaces reflect, and personal comfort changes. Leave room to adjust brightness and direction.
Choose Color Temperature: 2700–3000K Homes, 3500–5000K Workspaces (IES)
How to Choose the Best Lighting for Any Space?
Color temperature changes how a room feels and how surfaces appear. The IES Lighting Handbook places warm light around 2700–3000K, making it suitable for homes, bedrooms, dining areas, and reading corners. At 2700K, wood often looks richer, while 3000K gives white walls a cleaner appearance. I have found 3000K more flexible in kitchens, though personal preference still matters. Warm light can feel too yellow in rooms with cool gray finishes.
Workspaces usually benefit from 3500–5000K lighting. The IES recommends considering visual task demands, glare, and surrounding brightness rather than choosing color temperature alone. A 4000K ceiling fixture can improve contrast on paper without making a small office feel clinical. For detailed workshops or technical rooms, 5000K may reveal fine edges more clearly. It can also expose every flaw.
The U.S. Department of Energy reports that qualified LED lighting can use at least 75% less energy than incandescent lighting and last up to 25 times longer. That efficiency matters, but color quality deserves equal attention. The DOE’s solid-state lighting research also emphasizes measured performance, including color rendering and lumen maintenance. Look for high color-rendering performance, low glare, and dimming compatibility. I sometimes prefer 3500K in home offices, despite common recommendations. The best choice depends on finishes, daylight, age, and the task performed there.
Set Color Quality: CRI 80+ General, CRI 90+ Critical Tasks (IES)
How to Choose the Best Lighting for Any Space?
Color quality should guide every lighting decision. The Illuminating Engineering Society recommends CRI 80+ for general areas, such as corridors, kitchens, and offices. This level usually renders everyday colors naturally and supports comfortable visual work.
Critical tasks require greater precision. Choose CRI 90+ for art studios, dressing areas, clinics, photography spaces, and detailed craft work. Skin tones look more believable, while fabric, food, and paint appear closer to their actual colors. However, CRI is not a complete quality test. It does not fully describe brightness, flicker, or every saturated color. Check the light source’s technical data, and consider TM-30 results when accurate color matters. A high CRI number alone can still disappoint.
Tips: Test samples under the actual fixture before installing many units. Place a red shirt, a wooden object, and printed images beneath the light. Compare them with daylight if possible. Keep the room’s purpose in mind. Warm light may suit a bedroom, while neutral light can improve focus in a workshop. I once treated CRI as the only decision point; that was too simple. Beam angle and glare changed the experience more than expected. Also, small spaces reveal poor color shifts quickly. Test first.
How to Choose the Best Lighting for Any Space?
Set Color Quality: CRI 80+ for General Lighting and CRI 90+ for Critical Tasks
The Color Rendering Index (CRI) uses a 0–100 scale to describe how accurately a light source reveals colors compared with a reference source. A minimum CRI of 80 is suitable for most general spaces, while CRI 90 or higher is recommended when accurate color evaluation is important, such as detailed visual work, artwork, healthcare assessments, and product presentation.
Control Visual Comfort: Aim for UGR<19 and Low Flicker (CIE/IES)
Choosing lighting begins with the eye, not the fixture. For offices, classrooms, and workstations, target a Unified Glare Rating below 19. CIE 117:1995 defines the UGR calculation, while EN 12464-1 commonly applies UGR<19 to demanding indoor tasks. The number depends on room size, ceiling height, luminaire spacing, surface reflectance, and viewing direction. A product rated “low glare” proves little alone.
Walk through the space at seated eye level. Check reflections on a monitor, bright patches near the window, and discomfort when looking across the room. The IES Lighting Handbook stresses that glare depends on the observer’s position and visual task. That sounds precise. It is not. A layout can meet a calculated value yet still feel harsh when screens tilt or furniture moves.
Flicker deserves equal attention. IEEE 1789-2015 links visible modulation risk with frequency, modulation depth, and exposure time; higher frequency generally reduces risk, but it does not make poor drivers acceptable. Request measured flicker data, including percent flicker, flicker index, and frequency. For regulatory screening, IEC TR 61547-1 and European ecodesign limits use PstLM≤1 and SVM≤0.4 for applicable lamps. These figures are useful filters, not complete comfort guarantees. In practice, test dimming at 10%, 50%, and 100%, especially with cameras and motion. Some fixtures behave well at full output and visibly pulse when dimmed. I still verify this on site, because specification sheets can hide the uncomfortable part.
How to Choose the Best Lighting for Any Space? - Control Visual Comfort: Aim for UGR<19 and Low Flicker (CIE/IES)
Use the following values as practical design targets. Final compliance depends on the complete luminaire, room geometry, surface reflectances, mounting height, viewing direction, dimming level, and applicable local standards.
| Space Type | Recommended Lighting Approach | Typical Maintained Illuminance | UGR Target | Color Quality Target | Recommended CCT | Flicker Control Target | Key Visual-Comfort Check |
|---|---|---|---|---|---|---|---|
| Open-Plan Office | Low-glare direct or direct/indirect LED luminaires with controlled shielding and wide spacing. | 300–500 lux on the working plane | ≤ 19 | CRI/Ra ≥ 80; R9 or skin-tone performance should be considered where people are frequently viewed. | 3500–4000 K | PstLM ≤ 1; SVM ≤ 0.4 | Check screen reflections, high-angle brightness, and luminance contrast between task and surroundings. |
| Meeting and Conference Room | Layered lighting with dimmable ambient light and separate vertical or presentation lighting. | 300–500 lux on the table or task plane | ≤ 19 | CRI/Ra ≥ 80; higher color fidelity is useful for faces, materials, and presentations. | 3000–4000 K | PstLM ≤ 1; SVM ≤ 0.4 | Control glare from luminaires visible to seated occupants and avoid bright sources behind presenters. |
| Classroom and Training Room | Uniform, low-glare ambient lighting with separate controls for board, desk, and presentation zones. | 300–500 lux on desks; higher vertical light may be needed at teaching surfaces. | ≤ 19 | CRI/Ra ≥ 80 | 3500–5000 K | PstLM ≤ 1; SVM ≤ 0.4 | Check visibility of whiteboards, displays, and projected images from all seats. |
| Computer Workstation Area | Shielded luminaires, indirect components, and carefully positioned task lighting to reduce reflected glare. | 300–500 lux on the desk, subject to screen and task requirements | ≤ 19 | CRI/Ra ≥ 80 | 3500–4000 K | PstLM ≤ 1; SVM ≤ 0.4 | Evaluate screen luminance, veiling reflections, luminaire position, and contrast at the user’s viewing angle. |
| Retail Sales Area | General ambient lighting combined with adjustable accent lighting; use beam control to highlight merchandise. | 300–750 lux, depending on merchandise and visual detail | ≤ 22; ≤ 19 where detailed visual work or prolonged occupancy requires it | CRI/Ra ≥ 80; higher fidelity is preferable for color-sensitive merchandise. | 3000–4000 K | PstLM ≤ 1; SVM ≤ 0.4 | Prevent accent-light glare in customer sightlines and avoid excessive brightness contrast. |
| Reception and Lobby | Soft ambient illumination with vertical lighting for faces, signage, and architectural features. | 200–300 lux on the floor or general task area | ≤ 22; ≤ 19 for reception desks and prolonged visual tasks | CRI/Ra ≥ 80 | 2700–3500 K | PstLM ≤ 1; SVM ≤ 0.4 | Check facial modeling, reflections on stone or glass, and glare for people entering from darker areas. |
| Hospitality and Dining | Layered, dimmable lighting with controlled decorative, ambient, and task components. | 100–300 lux, depending on the activity and atmosphere | ≤ 22; use ≤ 19 for detailed tasks and sensitive occupants | CRI/Ra ≥ 80; high color fidelity is recommended for food and interior finishes. | 2700–3500 K | PstLM ≤ 1; SVM ≤ 0.4 | Assess dimming behavior, visible modulation, candle or decorative-source contrast, and table-top shadows. |
| Healthcare Examination Area | Uniform, cleanable luminaires with separate examination and general ambient controls. | 500–1000 lux for examination tasks; verify the applicable healthcare standard. | ≤ 19 | CRI/Ra ≥ 80; higher fidelity may be needed for clinical observation. | 3500–5000 K | PstLM ≤ 1; SVM ≤ 0.4 | Check patient and clinician viewing angles, shadow control, surface cleanliness, and color discrimination. |
| Corridor and Circulation Area | Uniform ceiling or wall-wash lighting with good guidance and minimal direct source brightness. | 100–200 lux on the floor, depending on use and safety requirements | ≤ 25; ≤ 19 is preferable in long-stay or visually sensitive areas | CRI/Ra ≥ 80 | 3000–4000 K | PstLM ≤ 1; SVM ≤ 0.4 | Check adaptation at transitions, stair visibility, wayfinding, and glare from sources in the line of travel. |
| Industrial Inspection Area | High-uniformity task lighting with adjustable position, shielding, and suitable optical control. | 500–1500 lux, depending on inspection detail and surface characteristics | ≤ 19 where detailed or prolonged inspection is performed | CRI/Ra ≥ 80; spectral quality must suit the material being inspected. | 3500–5000 K | PstLM ≤ 1; SVM ≤ 0.4 | Check specular reflections, stroboscopic effects on moving machinery, task-plane uniformity, and shadows. |
Technical notes: UGR is a calculation for a lighting installation rather than a fixed property of a lamp or luminaire alone. It should be evaluated using the room dimensions, surface reflectances, luminaire photometry, observer position, and viewing direction, following the Unified Glare Rating method described in CIE 117 and referenced by relevant lighting standards. The flicker values shown are practical screening targets commonly used for LED lighting: short-term flicker indicator PstLM ≤ 1 and stroboscopic visibility measure SVM ≤ 0.4. Confirm the final design with applicable CIE, IES, EN, IEEE, building, workplace, and safety requirements.
Related Posts
-
Ultimate Guide to Sourcing the Best Leading Lighting Solutions for Global Buyers
-
10 Essential Tips for Perfect Light Lighting in Your Home?
-
How to Choose the Right Led Lighting System for Your Home
-
Ceiling Led Lights Market Forecast and Trends for 2025
-
7 Compelling Reasons to Choose Landscape Lighting for Your Outdoor Spaces
-
Unlocking the Benefits of Path Lighting: Essential Tips for Global Buyers